The first thing you need to do on your AWS journey is to create an AWS account.
Here are the steps:
Navigate to aws.amazon.com and click create an AWS account.
For your root, use your email address. You could use aliases or set up arbitrary forwarding for emails to go to a specific inbox.
Next, choose an account name. This can be changed later but you can name it "management account" for now.
Verify your email address by entering the verification code sent to your email into the provided field.
After email verification, set a root user password following the password requirements provided.
Continue by selecting the type of account you are creating (business or personal) then input your name and other personal information as required.
Next, provide your credit card details. No worries about any charges, everything you will do is within the free tier.
Verify your phone number.
The last step is to select a support plan. For starters, the Basic free support would suffice. Then, complete the signup.
After successfully creating your AWS account, sign in to the AWS Management Console.
The next important step is to set up spend alerts within the console. You want to be alerted when you spend on AWS. To set this up:
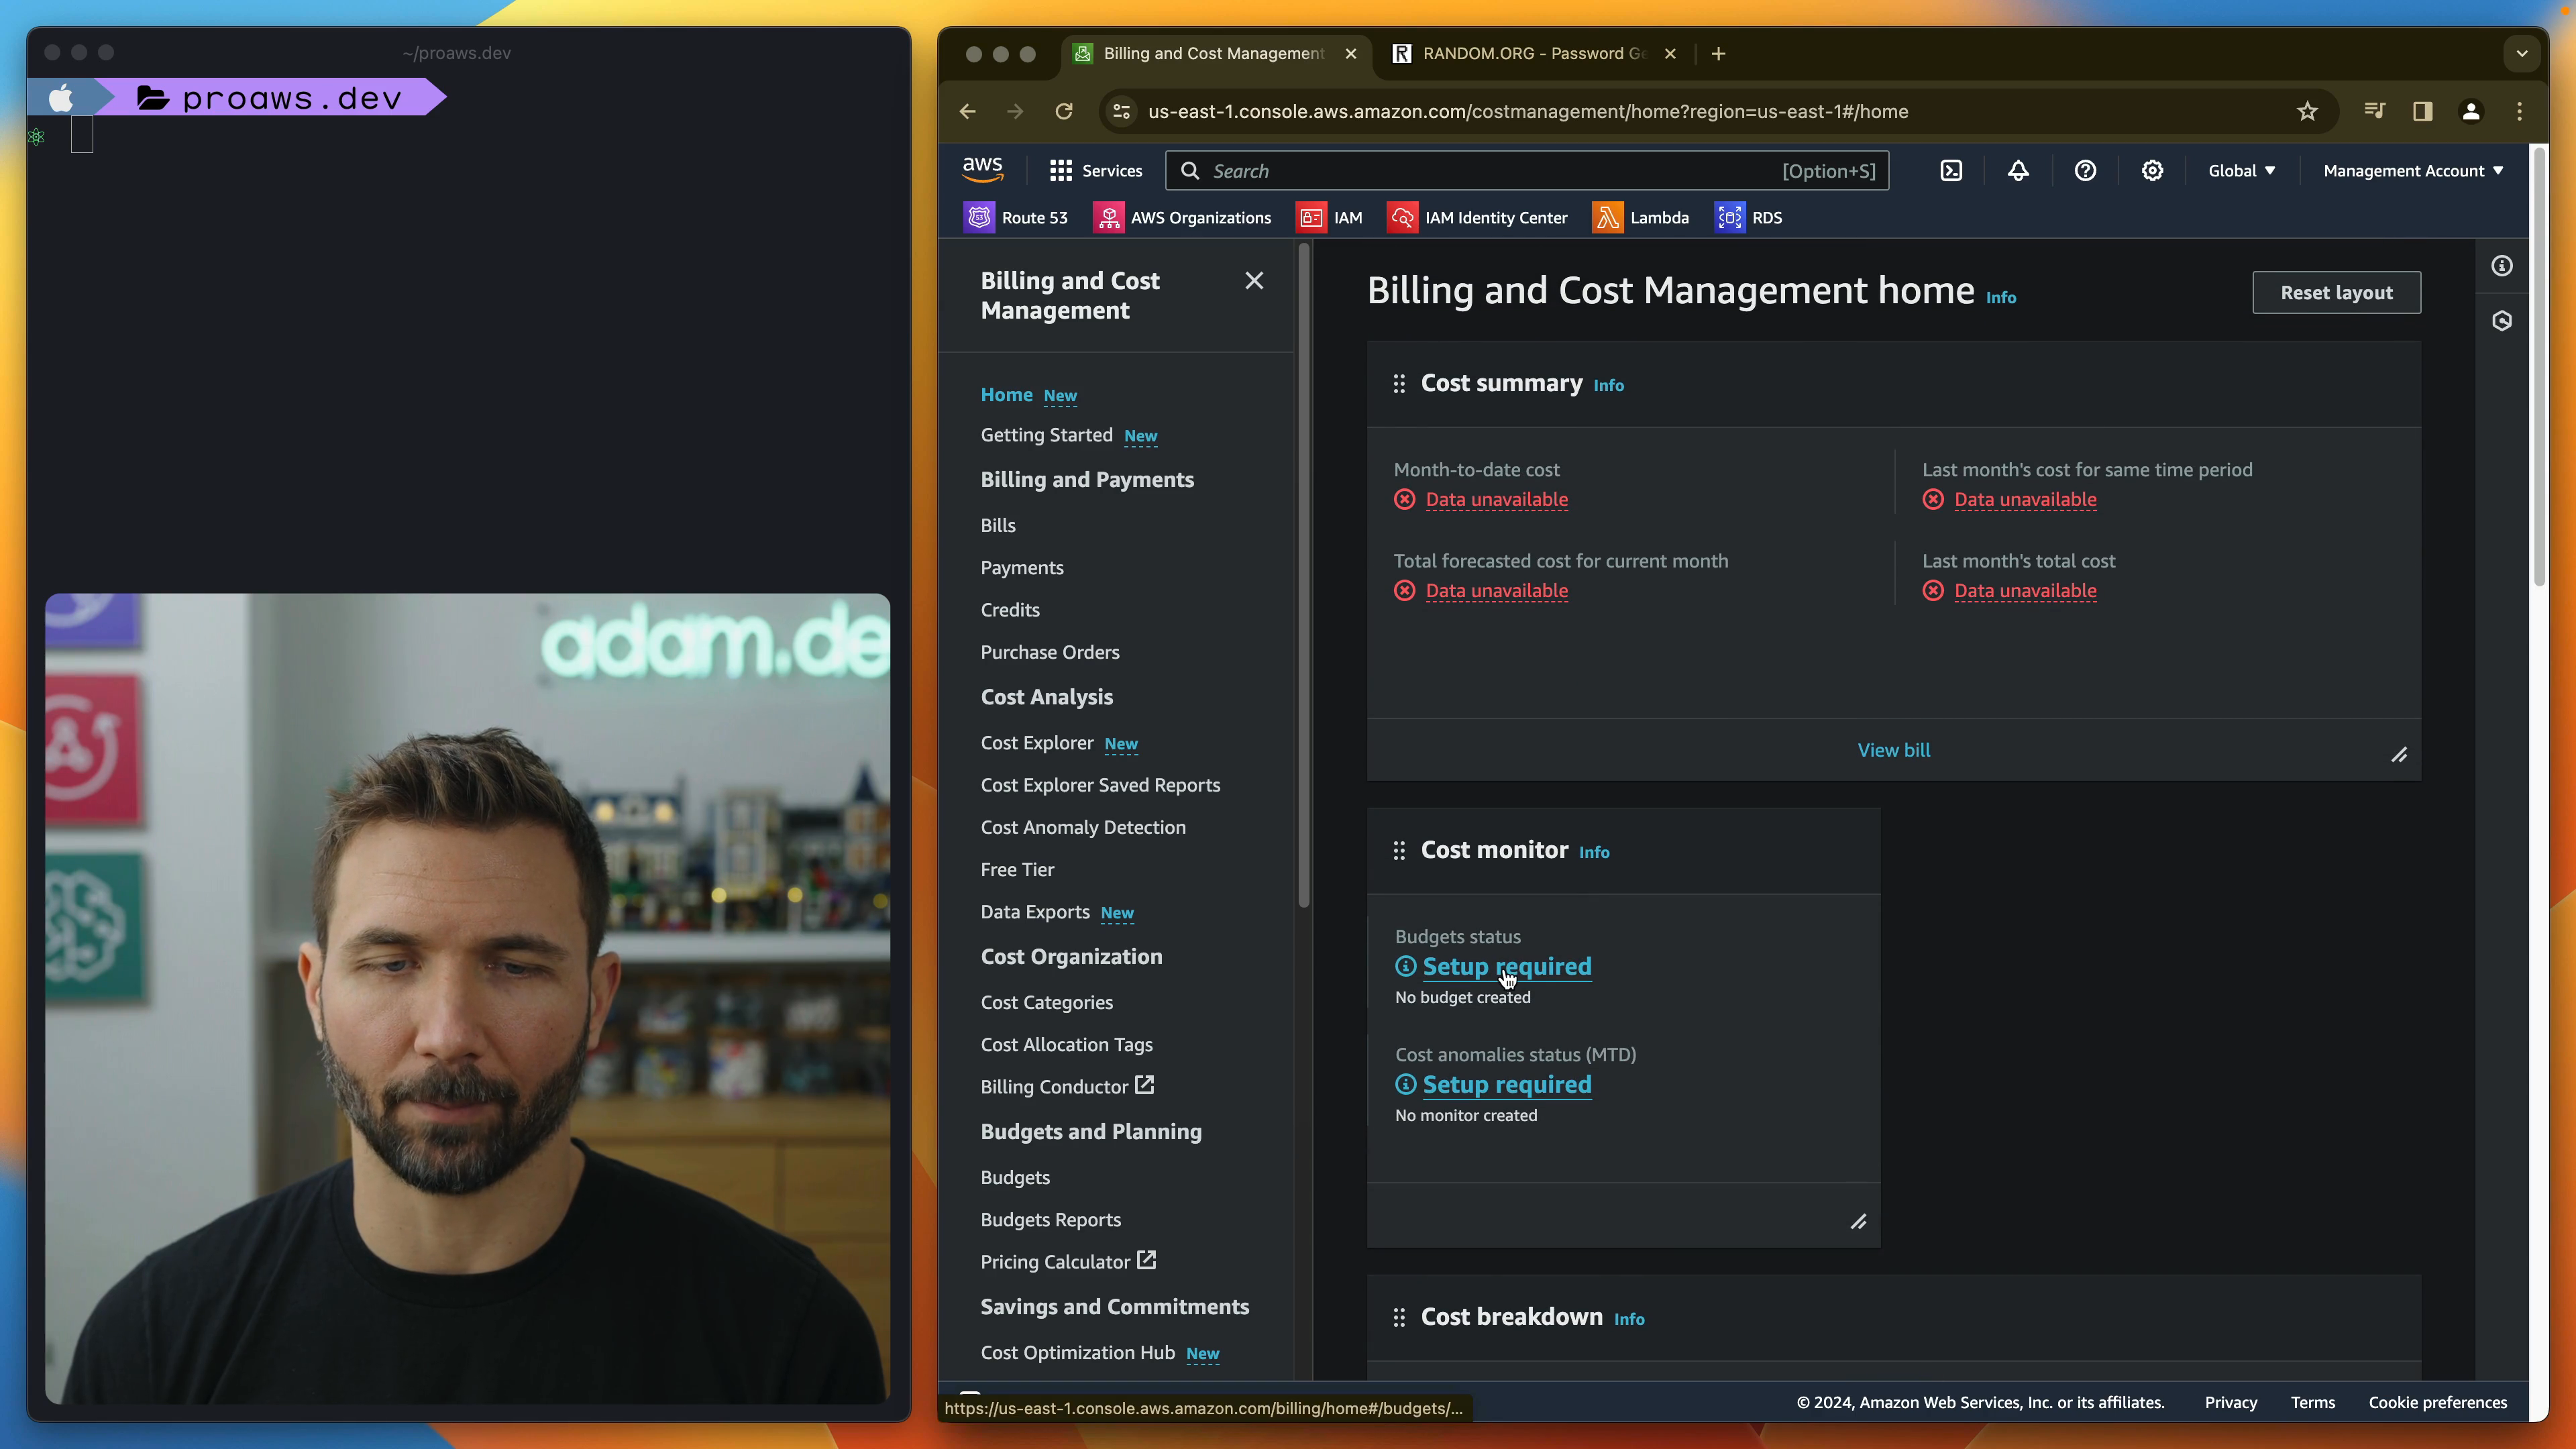
Navigate to billing and cost management. You will see that the budget status requires setup.
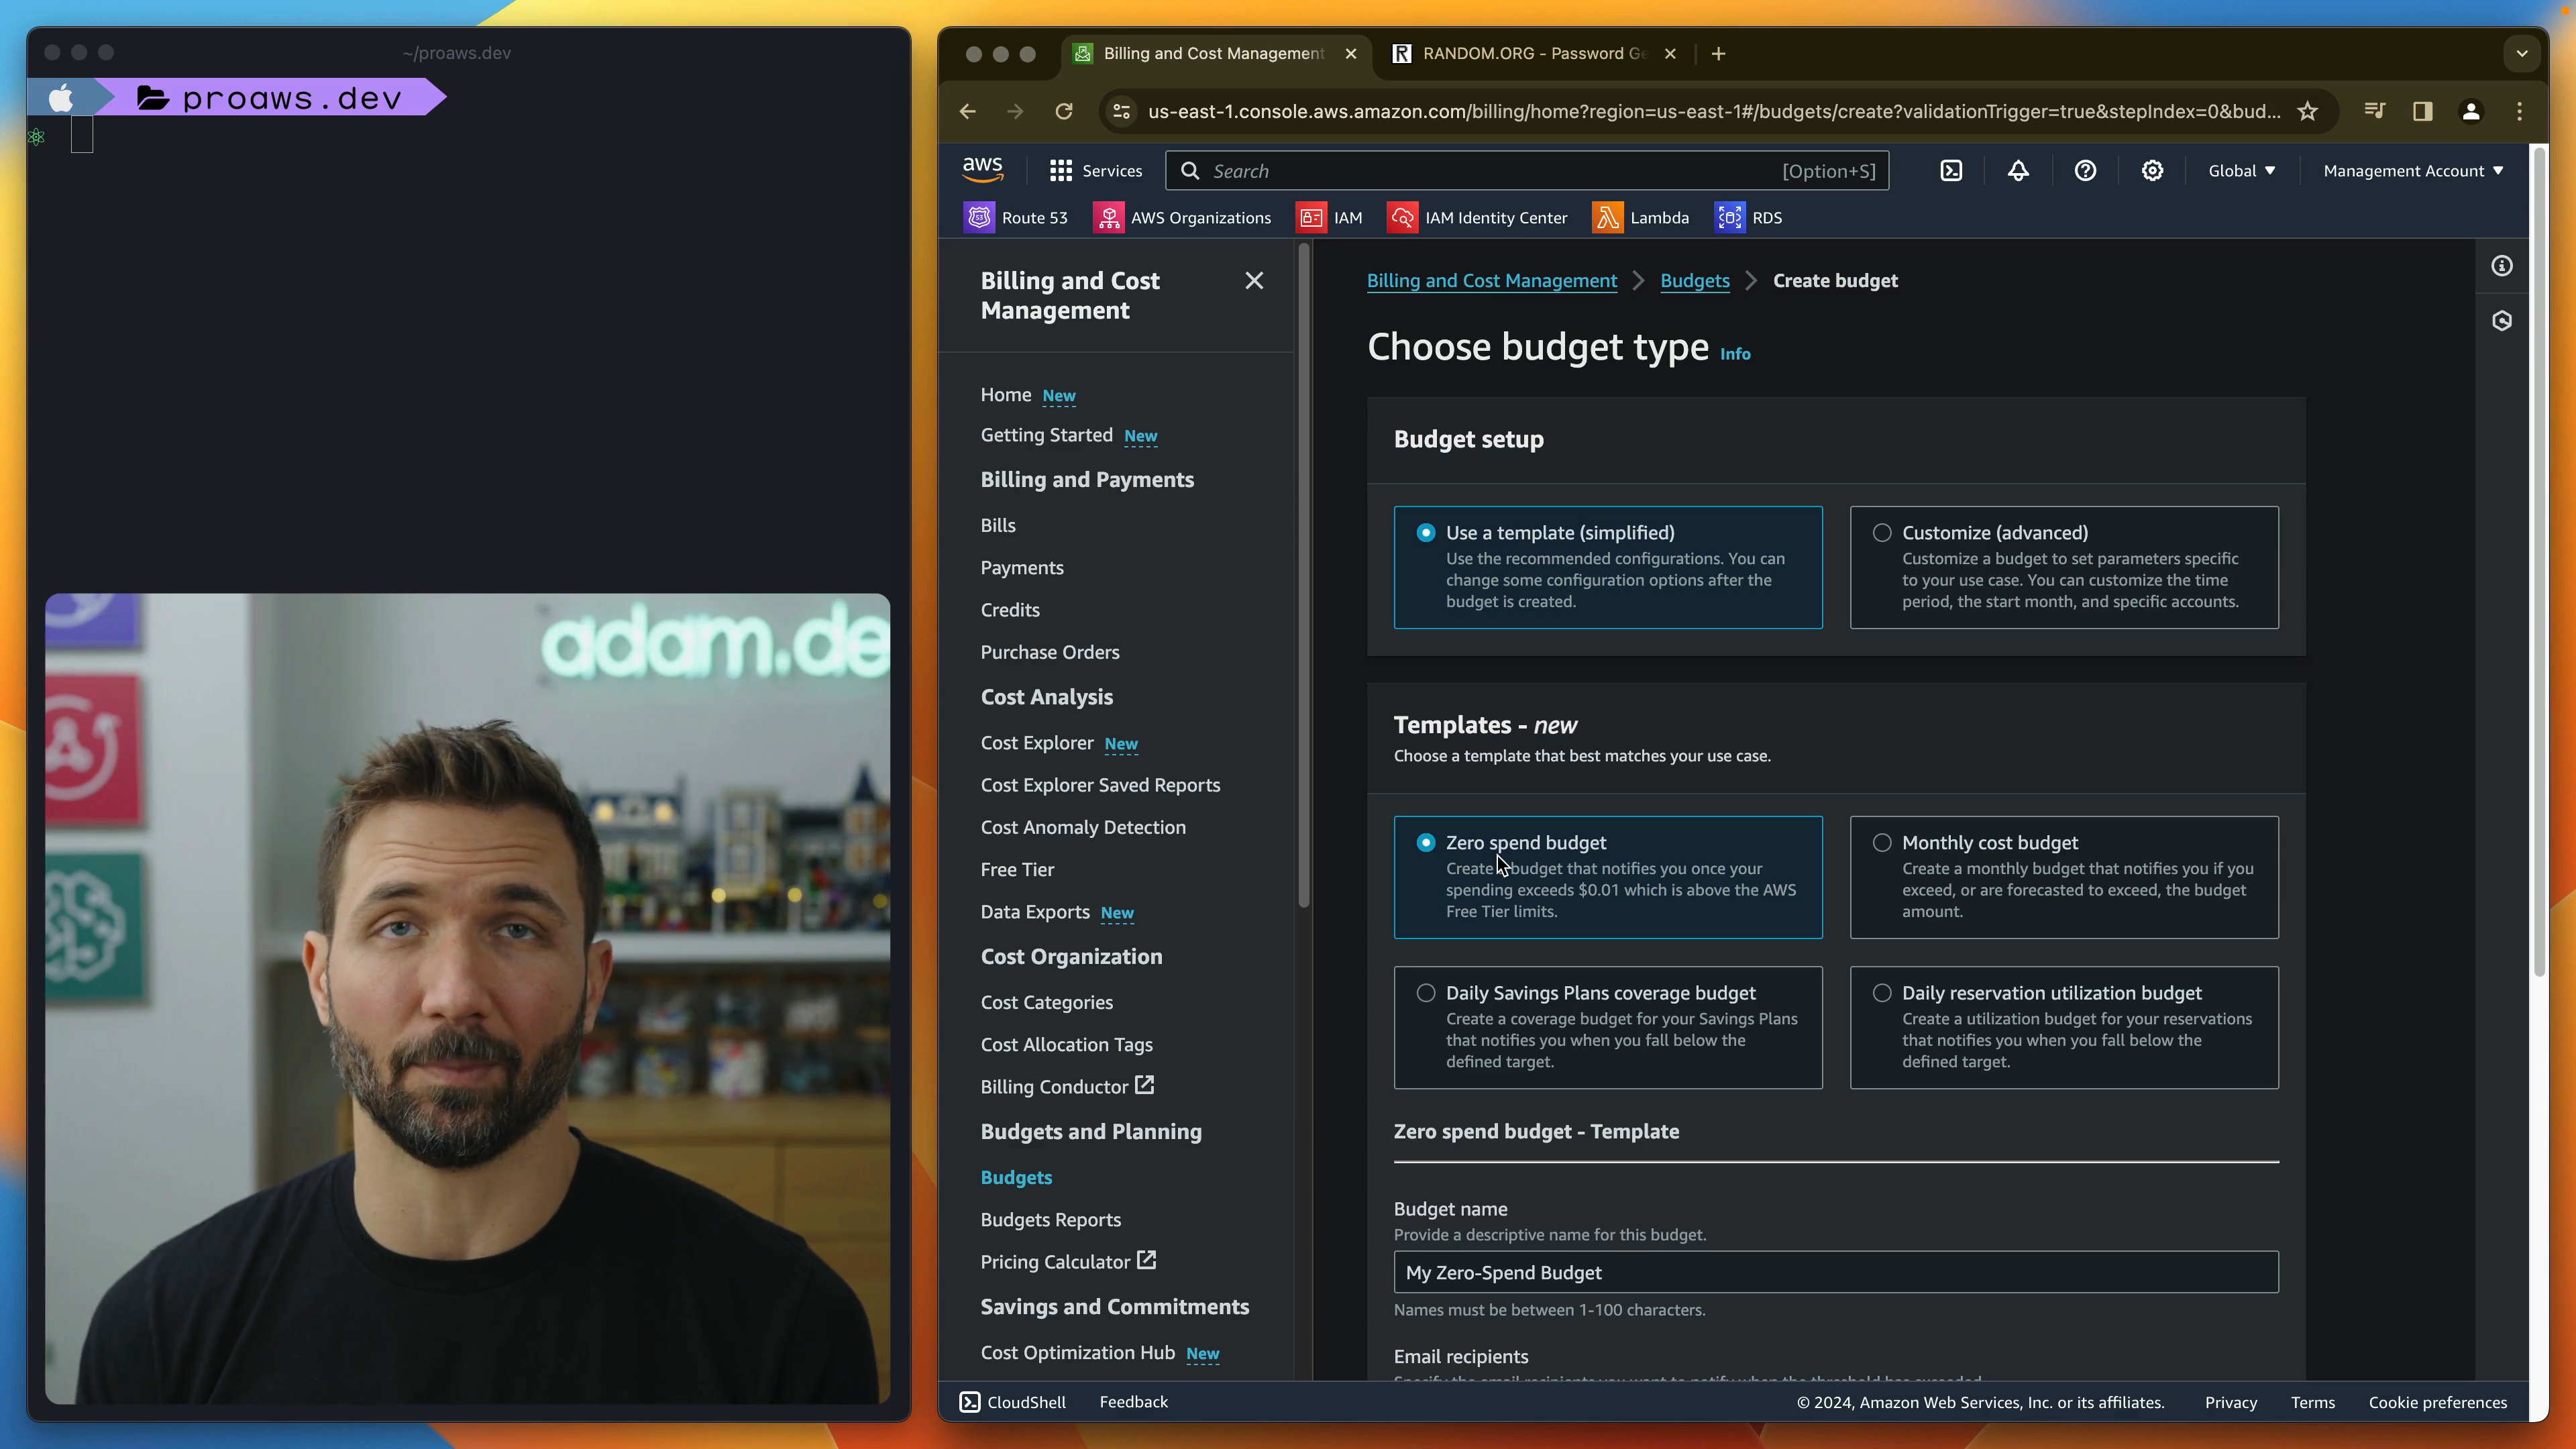
Click on budgets on the left-hand side then select create a budget.
Using the zero spending budget template, set up the budget so that you receive an email if there's any spending outside the free tier.
Enter your email address and create the budget.
Now you will now get an email alert every time you start to accrue any spending!
Transcript
Loading...
Level up with Basic Elements of AWS
I respect your privacy. Unsubscribe at any time.
This is a free tutorial
In exchange for your email address, you'll get full access to this and other free ProAWS tutorials.
Why? First and foremost, your inbox allows us to directly communicate about the latest ProAWS material. This includes free tutorials, AWS Tips, and periodic update about trends, tools, and AWS happenings that I'm excited about.
In addition to the piles of free AWS content, you'll get the earliest access and best discounts to the paid courses when they launch.
There won't be any spam, and every email you get will have an unsubscribe link.
If this sounds like a fair trade, let's go!
First step on your AWS journey, we've got to create an AWS account. We won't get very far without one. So go ahead and navigate to aws.amazon.com and click create an AWS account. Now for your root, use your email address. It depends on how you've got your email set up if it's a personal email address maybe a gmail address if you had adam at gmail.com I like to use these plus aliases you can just say plus AWS and it'll still go to your normal inbox but it'll be noted that it came to that plus AWS.
You kind of know this is AWS related communication. If you've got a work email address, I like to set up like arbitrary forwarding so that anything at adam.dev just goes to my normal inbox. So I would do something like aws at adam.dev in that case. For the account name, this can be changed later. It's not a huge deal.
But I actually like to call this the management account. And there's a reason for that. It'll make more sense later when we get into AWS organizations. But for now, just trust me. So we're going to click verify email address and at this point we're going to put in the verification code.
I'm not going to show this part because it's my email address But you'll get a code in your email which you can paste in and verify. Okay, so I verified my email address. And at this point we have to choose a root user password. It does have a bunch of requirements here. Again I'm not going to show this part because passwords are sensitive.
I do like to go to random.org slash passwords and and All right, I've put in my password. I'm going to continue Let's save that in my browser And in this case, I'm just creating this for a personal use. You've got the business or personal option there. I'm going to put in my name. A lot of this stuff isn't information I'm going to want to show, but fill out the forms.
You fill out forms. You know how to fill out a personal information form, so go ahead and do that. All right, the third step. This is where we put in our credit card. Again, Don't worry about any charges.
Everything we're going to do is going to be within the free tier. But you do have to provide that billing information. So go ahead and do that and click Next. Step four, Another identity verification step. We verified our email earlier, now we gotta verify a phone number.
So go ahead and enter that in. Again, I'm gonna skip this step so it's not in the recording. Alright, I'm gonna put in the code that they sent me and continue. The last step here, we've gotta select a support plan. We're just going to choose the basic support, which is free.
As you start to increase your usage of AWS, you're going to spend more on support just for increased, shortened time frames on ticket responses and things like that. And as you're running production workloads, you're going to value that stuff. But for now we can get by with just a basic free support. So I'm going to complete signup and we have an AWS account. Now at this point, we've got to sign into the console.
So we're going to go to the AWS Management Console, which is just a button click away. And we're gonna, this is a root user that we're signing in with. I've got my credentials saved here. And we're in the AWS console, that's it. So there's really not a lot to creating the AWS account.
We talked about the fact that everything we're going to do is going to be within the free tier. In the event that we did create any kind of cost implications, we create a resource that actually accrued some usage and went outside the free tier. We wanna be alerted, we wanna know that we're spending on AWS. So let's go into billing and cost management. And you're gonna see here budget status, setup required.
I think you can find it over here on the left too. You just go to budgets. And we're gonna create a budget. And they've got these templates, which are great, because in our case, this is what we're trying to set up. We want to set up an alert if there's any spend.
So they've got this template called zero spend budget. And if there's any spending outside the free tier, it's going to send us an email. That's all we want. Super simple to set up. We're just going to put in our email address and create budget.
And that's it. At this point, we should get an email any time we start to accrue any kind of spend. There are services that fall outside the free tier. So if you were to like register a domain in Route 53 for instance, that's a service that you're going to accrue costs. There is no free tier there.
So we'd be alerted as soon as we did something like that and that's good to know. So now you can kind of rest assured that Not only are we doing things within the free tier, but if you did accidentally end up outside those bounds, outside the free tier, you're gonna get alerted.
 Level up with Basic Elements of AWS